


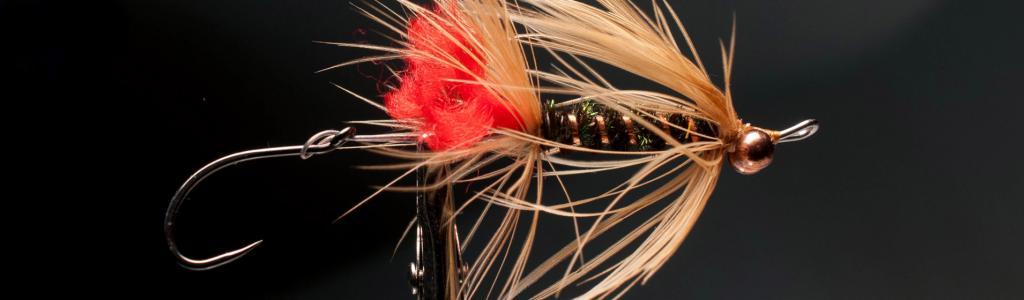
Doing a Step-By-Step
This article teaches you how to do a proper series of step-by-step photos of a fly pattern being tied - also known as an SBS.

The Global FlyFisher features a lot of fly patterns, and basically every article on a pattern is followed by a series of photos showing how to tie the fly. Sometimes just a few pictures – like 4-5-6 of them – other times there are 20, 30 or even more images of the process.
I know that videos are the thing, and the web is overflowing with them. There are far more videos being made than Step-By-Steps.
The Step-By-Step - often just called SBS - is kind of old fashioned and something that belongs in books and magazines. But I still make them. First of all: I like them, secondly: they do a great job of instructing, and thirdly: if I were to make videos, I'd spend a lot more time doing so than taking pictures - in spite of the fairly elaborate process described below.
If a video is to live up to my preferred standards, it requires way more work. The far majority of online tying videos are not good if you ask me, and if I am to do videos, I want them to be good, and that takes time.
So for now it's still just images for the most part.
And the SBS's I see online aren't much better than the videos. so here's my advice on doing them well.

Consistency, consistency, consistency
People post a lot of SBS's in online forums, on Facebook, on their own web sites. While it's absolutely worth praising them for the effort, quite a few could do with a crash course in Step-By-Step fly tying photography.
I value consistency in the series of photos showing the steps. That's consistency in all aspects:
- Image quality like exposure and sharpness.
- Angle and size of the fly.
- Light and background.
- Visually documenting the whole tying process.
Let me break these aspects down and cover them one at a time.
Exposure and focus
You need to use a good camera and you need to control its exposure and focusing. You can use your phone, but then you need to take proper control. Most modern phones allow total manual control. I own a Huawei phone, and it has a setting with manual control of all parameters like exposure, color and even autofocus. It can be hard to find these settings, but when using the camera app, look for a "manual" or "pro" mode and learn to use that.
Alternatively you can use a "real" camera like a compact, mirrorless or an SLR, which typically gives such control as a standard, but might require a macro lens to get sufficiently close.
Make sure the camera can take sharp, identically exposed and properly focused images of a fly close up before going any further. If you can lock exposure, focus and color balance, do so. More details about this below.
Most compact cameras and phones can do a decent job of shooting macro (closeup). Some will turn to this setting automatically, while others need to be forced to focus closely. Look for a flower symbol, which is almost universally used to show the macro setting.
I can't teach you how to set up the camera to do uniform exposure and how to get it to stay focused on the same detail for a series of pictures, but in order to get a good and uniform series of pictures, it's mandatory that you don't leave it to the camera or phone to decided exposure and focus for every picture.
You need to control that! 100%.

Angle and size
So, in order for this to produce decent pictures, you need to go close. That means that the fly needs to fill the frame and that again mostly means that the camera has to have a macro setting. Experiment a bit to see where you need to place the camera to get the best pictures of the process. Not just of the fly, but also of the materials you hold and maybe of your fingers and the tools. What is needed to show the tying steps needs to be in the frame – and no more. One of the most common errors in SBS's is to place the camera too far away from the fly, which means we see a lot of distractions and can't see the fly very well.
Once you have found the proper distance and angle, fix the camera there.
I say it again: fix the camera!
It's no good to shoot each step handheld, laying down everything, picking up the camera, shooting one picture and then laying down the camera and continuing the tying. That will give varying angles and distances, different exposures, missing focus and all kinds of misery. Inconsistency in other words. The opposite of what we want.
Use a simple tripod, a clamp, or even just a block of wood and a rubber band as described in this earlier article. Anything that will hold the camera and keep it in the same position in relation to the vise and the fly.
If your camera has a zoom, consider moving it a bit away and zooming in. This will isolate the subject (the fly) and blur out the background, which will help getting focus on what's important. Some cameras don't allow macro when zoomed, but that will vary from camera to camera. On phones zooming usually makes no sense. It basically just crops the image and deteriorates the quality. Simply move the phone closer.
All this will improve the quality and homogeneity of your SBS series significantly.

Light and background
Turn off any built-in light in the camera or phone!
No in-camera flash or phone LED will give a proper and useful light, but result in harsh and bright light, and ugly, hard shadows. Light must come from a large lamp or from a window. You can use a tying lamp, or some kind of LED lamp, but then use a piece of opaque paper or cloth in front of it to diffuse the light. Or use several lamps and lots of diffusers and reflective surfaces to even out the light and remove shadows. The easiest method is to use a large desk lamp or an LED panel - or simply sit close to a natural light source like a window, but NEVER in direct sun.
You can also use an external flash if you use a camera that supports that, but as with the lamps: diffuse it to get decently soft light.
If you are shooting towards yourself, which is the easiest, wear something uniform and fairly neutral. Save the colorful Hawaii shirt for Hawaii.
If you shoot away from yourself, having the camera between yourself and the fly, make sure you have a large piece of cardboard or something similar set up as a background. It must fill out the whole background, and not just be a white patch behind the fly itself with your messy office, tying table or living room visible in the background. You might find your tying environment tidy, but visually it's messy.
Mount a large piece of uniformly colored cardboard or fabric with clamps or tape so that it stays put while you tie and shoot. And make sure it's far enough behind the fly to avoid shadows. Distance also makes it more blurry, which is good.
Last but not least: fix the color balance in your phone or camera while you are setting all other parameters. That will keep colors identical all through the series.
Visual narrative
When you tie, make it a small story about tying the fly. When choosing steps to shoot, the natural places to stop and photograph are where the tying has a natural pause and allows you to let go of the materials and thread. But that might not be the places that illustrate the tying best. Consider stopping at critical places, tying a half hitch to hold the materials and leave your hands free. Select the steps that are important or difficult and try to illustrate them.
As a means of shooting the "action" you can use a delay and shoot using the built in self timer, or you can set the camera to shoot at intervals if that's possible. Then simply tie away, making sure that you have the camera exposing at the right places while you tie.
If you are using a phone, you can also consider using an app to trigger the camera using your voice as described here. Other options are apps made for the purpose like Voice Camera or Open Camera both for Android. The latter can also help show you what features your camera phone supports. I'm sure something similar exists for the omnipresent iPhones.
In my own slightly more advanced setup I use a home made foot controlled remote, which makes it possible for me to tie using both hands and take a picture at any time I want.
Be two people
The most obvious way of getting everything under control during the tying itself, is simply to be two people: one tying, one taking pictures. Rather than trying to grow a third hand for releasing the camera, have a friend press the shutter release at the proper moments. A fly tying friend will know what's going on and can be self running, but a non-flytyer can act as a human Voice Activated Remote Control, and should just press the button when you say so. The rule about fixing the camera still stands! Avoid any handholding of the camera if at all possible. It will never be consistent or stable.
The most common errors
When I receive images for GFF, the errors I see most often are:
- Very inconsistent images caused by the camera being hand held and angles, distances, focus and light varying from frame to frame.
- Odd and inconsistent colors caused by camera white balance and light not being matched and varying from shot to shot.
- Cluttered images caused by the angle of the shots combined with a messy background. like shot from the tyer's point of view down towards a cluttered tying table.
- Only partially covering backgrounds caused by a too small piece of paper or cardboard placed (or simply hand held) too close behind the fly.
- Blurred images caused by camera autofocus not being able to focus on the fly in every shot, or fuzzy because the camera was shaken during the exposure.
All these errors can be fixed by following the advice in this article.
Know your fly
One important thing when doing instructional photos – or instructing people in anything for that matter – is to know what you are doing. Oddly enough there's a lot of step-by-steps and videos online, where it's pretty obvious that the instructor doesn't know what he or she is doing. Fumbling, undoing and redoing or simply doing things wrong is not the right way to do do an instructional series.
You need to be able to tie the pattern you are showing with confidence and consistency (see, that word again). Tie a couple "off camera" to make sure that materials act as expected and that proportions are OK. Then tie a fly while taking some sample pictures. Make sure things come out right, before finally shooting your full image series.
Expect to redo the shoot when you see the images. Things don't always to as expected. The focus might be off, the light too bright, the camera might shake leading to blurry images. If the pictures aren't good, discard them and do it again.
Yup, it's a chore, but if you want to produce good quality, expect to put in some work.
Additional images
While you have the tying stuff out, remember to shoot some extra images while you are at it: materials, finished flies, variations, tools or what you feel for. These make excellent “fillers” when showing the series. Also shoot the finished flies in various settings: in the vise, laying on a table, in a cork, on the materials and so on.
In the box

Once the images are in the camera, you will need to edit them.
Yes, that's right.
You - will - need - to - edit - them!
It's very rare that images are OK right out of the camera (like in never). Even my images, which are shot with manually set professional SLR cameras set up in rock solid clamps, well controlled angles and distances, with 100% controlled light will need editing. Always!
I'm not saying that you have to be as meticulous as I am, but do yourself and your viewers the favor of at least checking your images with scrutiny.
Open them all in a photo editing program and make sure that they are identically exposed, have the right color, are sharp and cover the subject. Discard the images not needed. You may not need three images for starting the thread: attaching it, the first wraps, cutting it. A single image might be enough to show a step.
I also crop the images to show what's needed and no more. Using a program such as Photoshop, which lets you to have the images in layers in the same frame, will allow you to put all exposures on top of each other for alignment and cropping.
All my SBS's go through this process. Once I'm sure all images are homogeneous, I export them for the purpose I want: web, print, a presentation or what other need I may have. I save the full resolution, stacked, uncropped originals so that I can return to the file later and reuse the images.

Finally, write captions
The final step in this long process is to sort the images and write a text for each. Yes, again I know it's work, but it's your job as the creator and teacher to do that work in order to get the message across as well as possible.
Number the images with numbers and possibly text - like 01-starting-thread.jpg, 02-tying-in-rib.jpg, 03-tying-in-tail.jpg. Notice how the leading zero in the numbers will ensure that the images are sorted properly and how the rest of the name describe what's in them.
Then create a file and add more text for each photo if needed. That will enable you - or me or some other editor - to use them very easily in an article or pattern description.
In conclusion
Sure this is an ambitious and meticulous way of shooting a simple step-by-step for tying a fly, but if you want to convey the steps in the best possible way, that's the level to strive for.
I will gladly publish articles and patterns that have set the goal lower that this, but every time I get a series of images that are just ready to be entered into my publishing system, and are consistent and easy to work with, I'm so happy! And who doesn't want to see med happy?
PS: I'm working on an article about making a fly tying videos too, and trust me: that will be just as ambitious and meticulous.
Related articles


Read more about why you should register.
Related content


More content from the front page


Since you got this far …
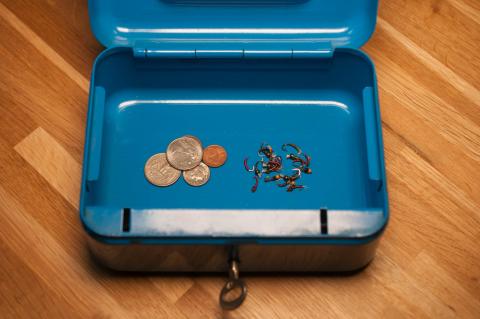
The GFF money box
… I have a small favor to ask.
Long story short
Support the Global FlyFisher through several different channels, including PayPal.
Long story longer
The Global FlyFisher has been online since the mid-90's and has been free to access for everybody since day one – and will stay free for as long as I run it.
But that doesn't mean that it's free to run.
It costs money to drive a large site like this.
See more details about what you can do to help in this blog post.