Dutch Tom Biesot made some beautiful leather cases for his homemade fly reels

About three years ago I had the idea to make a leather fly reel case for two of my homemade fly reels, also encouraged by my wife who makes beautiful bags. These are usually made of fabric or a combination of leather and fabric. Usually I apply the hardware to the leather, such as snaps, rivets and rings. For this purpose, we have purchased some leather tools in recent years. Leather is a nice material to work with and I like the smell too.
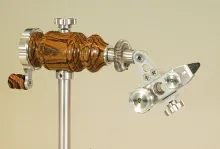
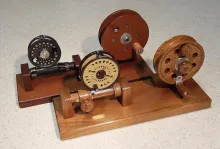
I usually work with metal, aluminium or wood as a hobby, so this is completely different. Loyal visitors of the Global FlyFisher site are probably familiar with one or more of my articles, like Tom’s Reel, this describes a number of my homemade fly reels, including two special ones with a different shape. I thought it would be nice to make a leather reel case for these reels, also because they do not have a round shape and therefore do not fit well in a standard reel case.


Making my first leather reel case
The first reel case I made was simple and experimental. With only limited experience in leather-craft, I started with a simple design. First made a design drawing of all leather parts, a top and bottom part, two reinforcement parts and a middle part which consist of two pieces with a zipper in between. The two reinforcement parts are also the start and end point of the zipper. As a starting material I chose thin black leather from an old leather bag of my wife.


Cutting the leather
According to the drawing , cut out the necessary parts and drew a dotted sewing line on the flesh side of the leather. The intention is that the dotted lines of the top and bottom parts are sewn on to the dotted lines of the middle part pieces and then the case will be turned inside out.


Making mistakes
But first attach the zipper to both parts of the middle part, see the pictures. I asked my wife to sew the zipper in with the sewing machine. We thought we'd do the same with the top and bottom parts and sew them on the middle part with the machine. Due to lack of experience in making this type of cases, this became a difficult process. Sewing the rounded parts was a real “pain in the *beep*”. As a result, the zipper start and end point where no longer in the center on the backside of the case. I sewed the reinforcement parts on the in and outside by hand with the help of a home made “Stitching Pony” . The sewing is done with a “saddle stitch” with two needles .


After analyzing the problem, I discovered that I first should have glued the parts together , so that the sewing lines are nicely aligned and fixed. After that, sewing on the machine is much easier. You can make small notches on the rounded parts. After sewing, the case can be turned inside out, so the grain side is visible again. The case could have been a little bigger also, it is a precise fit. Because the leather is soft enough, I did not apply any lining. I am satisfied with the first result. I have learned a lot from it.


Making a logo
For the personal touch I applied my logo. I used transfer paper that is suitable for light fabric. I tried it out on a piece of leather. The image was drawn on the computer as a mirror image so that when printing, the ink layer is on the bottom, it is then transferred to the piece of leather with a heated iron. After some practice I obtained a nice leather logo which I glued on the reel case. The letters T.B.S. stand for “Tom Biesot Specials”.


Acquire knowledge
Having learned from the mistakes and becoming enthusiastic about this first reel case, I started to seriously delve myself into leather-craft, in order to start my second project. I spent many hours of watching YouTube films about leather-craft, but I gained the most of my knowledge by purchasing specialised literature. In particular the books written by “Al Stohlman” an American leather worker who has written many books together with his wife. After reading some of his very detailed books , I first started practising a lot, about cutting the leather, shaping the leather and hand sewing leather. The range of tools was gradually expanded as was the knowledge of the different types of leather for sale. The intention is to sew this second reel case completely by hand.

Selecting leather
After a lot of practice with pieces of leather, I started making the reel case for my “Fish Shape” fly reel. The design used approximately the same drawing as for the first case, but a thicker and stiffer type of leather was now chosen, namely “Natural vegetable tanned leather” with a thickness of 2 mm. For leather we talk about 5 ounces! For the top and bottom parts, I first made a wooden mold, taking into account the reel dimensions and not to small this time! A radius was added at the top of the mold and then painted twice with a lacquer.


Casing the leather
The intension is to form the top and bottom parts over the wooden mold. For this purpose, the leather must first be made wet by immersing it in water, how long depends on the thickness and experience. About an hour for this thickness, then let it sweat for another hour in a sealed plastic bag. In leather-craft this is called “casing “. Experience is very important here. Then carefully drape the leather over the wooden mold. The leather is very soft, so do not damage the “grain side”, because it cannot be repaired. We fix the leather with shoe nails or with a staple gun. If necessary cut out small pieces in the bends. After drying overnight, we have a nice and sturdy formed top part. We repeat this for the bottom part, the irregular edges are cut off at a height of 10 mm.


Round off the edges
The middle part for this case becomes a closed part with a cut out section for the zipper, the cut out is shorter then the length of the zipper. The length of the middle part is equal to the circumference of the top part. After cutting out the zipper recess, round off the long sides and the recess of the zipper with an “edge beveler”. Then use a “burnishing tool” or a wooden slicker and some moist or burnishing cream to finish the edges smooth and shiny. After this, the sewing grooves can be applied using an adjustable “stitching groover”, the stitching holes are placed in these grooves!


Applying the stitching holes
The stitching holes are made using a ”Diamond Stitching Chisel”. These are for sale with a 1 prong, 2 prong, 4 prong and more prongs. For the straight lines we use the 4 prong chisel or more, for the bends we use the 1 and 2 prong chisels. Under the leather we place a wooden block or a cutting board. Place the chisel in the groove and hammer the holes in with a plastic hammer. With the next step of the chisel we place the first prong in the last hole of the previous one, so that the stiches have the same length . This is a precise job.


Painting the edges
We finish the long burnished edges of the middle part and the recess of the zipper with a contrasting dark brown edge paint. We use an “Edge dying pen” for this, or a small cotton swab. This is also a precise job. Burnish the “moist” paint again with the wooden slicker, quickly rub it back and forth over the edge. After drying, we can glue the zipper into the recess on the inside, with an all purpose glue.


Sewing
After the glue has dried, the zipper can be sewn in place using the stitching pony. We do this with the saddle stitch, the most commonly used when sewing leather by hand. We use two needles on the thread, for this technique, see the recommended literature or watch YouTube .


Pyrografy on leather
On this reel case I wanted to add an image of a trout at the top and an image of the fly reel itself at the bottom part. Quit a challenge because I wanted to “burn” it on with the help of “Pyrografy”. I already had some experience with burning on wood, but not yet on leather. On scrap pieces of leather, I first practised extensively with different burning points and temperature settings. After gaining the necessary self confidence, I started with the burning of the first image. I made an outline drawing of a trout in the computer, based on a photo, the image of my fly reel was already in the computer. They were printed to scale and cut out and transferred to the leather using transfer paper.


At a quiet time of the day, with the phone switched off, I started burning the outline first, the biggest problem is that no mistakes are allowed. These are almost impossible to repair with pyrografy. In the worst case new leather parts have to be made, so take it easy and have a lot of patience. I gained more confidence with the burning and added more and more detail, also took many rest breaks. What worked in my favor here is that I have been an illustrator for many years.


After a few hours of sweating, a nice trout was burned and I took a beer to celebrate. The next day the same procedure was followed for the bottom part, first the outlines and then the details were burned. Difficulty in this image was the burning of many circles by hand, but fortunately this was achieved within two hours.


Assembling the parts
The top part can now be glued to the middle part with leather glue. Align the parts well with each other, for support we place the wooden mold into the top part. Fix the parts using shoe nails or thumbnails. After 10 minutes, carefully hammer the glue seams with a plastic hammer. Now glue the bottom part to the middle part and fix it with the thumbnails. Check whether the ends of the middle part fit together properly before gluing the ends, so that we have a closed seam. Hammer the glue seam and we have a nice reel case!


We can now use an awl to transfer the stitching holes from the middle part to the top part. Then sew the parts together with the saddle stitch, a time consuming job, because we have little space inside the case, but very relaxing! The thread that we use is a special waxed polyester thread for sewing leather.


Applying the reinforcement part
To strengthen the seam, we glue a strip of leather over the seam on the inside of the case. On the outside we make a couple of stitching grooves and make the stitching holes with the chisel, the inside is supported by a block of wood. Then sew the part with the saddle stitch.


Applying the lining
In this reel case we are going to apply a lining to protect the reel and also because it looks good! We use imitation sheepskin for this, we can use the wooden mold for sizing and we glue it in with an all purpose glue.


Making the zipper puller
Now we only missing a zipper puller, which we cut from a thin piece of leather. We decorate this using a ”Stamp Tool Set”, or with some homemade stamping tools. Because the leather is slightly lighter in color, I painted it with a leather stain, so that the color matched the case. The puller is glued to the zipper with leather glue. The fly reel case is now finished and it looks very professional!


Trying to make one yourself
Making these fly reel cases gave me a lot of satisfaction, because the end result was especially successful for the second case. Leather is a fantastic material to work with and over the past two years I have further developed my skills in making leather items. I hope that this article can encourage people to try making there own fly reel case with a personal touch. It was certainly not easy, but all beginnings are difficult. Noweadays a lot of information can be found on the internet and YouTube to make it easier to get started. There are also websites that offer starter sets for leather working tools for a reasonable amount of money, so getting started doesn’t have to be expensive. As I indicated in the beginning, the books of “Al Stohlman are highly recommended, especially for a beginner, they are extremely detailed with many drawings.
Good luck making your first leather fly reel case and show it to me!
Hand picked for this article
- Log in to post comments